Sustain / Real Bread Campaign / Recipes
Wholemeal sourdough bread
A recipe by homebaker and homeopath Neil Spence.


Neil says that this recipe ‘does not consume much time, so it fits easily into a busy lifestyle. I bake in tins, as I find the flour I use does not develop the strong gluten ‘scaffolding’ that helps support white sourdough breads. This also makes the recipe very easy; most of the process does not require any human interaction.’
He adds: ‘My experience with friends and patients is that some people who have difficulties digesting white, yeasted bread can enjoy eating long fermentation wholemeal sourdough bread.’
Ingredients
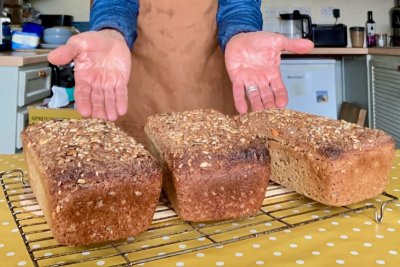
Makes three loaves in 22 x 13 x 8cm tins.
- 1650g wholemeal wheat flour
- 1000g water at room temperature (a little extra may be required)
- 30ml (3 dessertspoons) of mature sourdough starter
- 5g salt
- Seeds (eg pumpkin, sunflower, linseed and sesame seeds). Optional.
Method
If you store your flour somewhere cool, leave it to come up to kitchen temperature to make sure the dough gets a good kick off.
- In a large bowl mix the flour with air by picking it up and dropping it into the bowl. I find that doing this adds lightness and aids fermentation.
- Mix the sourdough starter with the water, then add this mixture to the flour and blend together to make dough. It should stick to a wooden spoon, then drop from it slowly in sticky lumps. It might seem too wet but don’t worry as the bran in wholemeal flour absorbs a lot of water.
- Cover the dough and set it aside for an hour or two to rest and hydrate (take up water).
- Mix the salt with a tablespoon of warm water, add this to the dough and mix well to distribute it thoroughly.
- Wholemeal sourdough does not require a lot of energetic kneading. Instead, gently stretch, fold and turn the dough using your hands, then repeat this sequence for about five minutes. Working the dough this way helps develop gluten. You might find that wetting your hands will help to prevent the dough sticking to them.
- If you are using seeds, add and work them into the dough until they are evenly distributed.
- Cover the bowl and set it aside to prove (ferment). When the dough has risen two thirds of the way up the bowl, spoon the dough into oiled tins. Depending on room temperature, it might take six hours for the dough to begin rising and 12 hours or more to be fully-proved and sufficiently risen. I often leave this dough for 24 hours before making it into loaves.
- If using seeds, you can sprinkle a few seeds on the top of each loaf.
- Loosely cover each tin and leave the dough to rise and fill the tin to the very top. Handle the tins carefully as the dough can collapse quite easily if you knock or drop them.
- Around half an hour before you think the dough will be ready to bake, heat the oven to 200°C (gas 6 / 400°F).
- Put a baking tray on the bottom shelf of the oven and, just before loading the tins on the middle shelf, pour boiling water into the tray.
- Reduce the heat to 190°C (gas 5 / 375F) and bake the dough for 45-50 minutes.
- You won’t see much ‘oven spring’ from this dough, meaning it will not rise much once it is in the oven. Take the bread from the tins, tap it to check that it sounds hollow. If not, put the loaves back in the oven to bake for a few minutes more.
- Turn the loaves out onto a wire rack and leave to cool completely before eating.
Baker’s Tips
‘I live in Scotland, where I buy Balcaskie Landrace wheat, grown organically for Scotland The Bread. I mill it myself using a Mockmill Lino 100 stone-grinding mill. Balcaskie Landrace is a mixed population wheat, which is genetically diverse and Scotland the Bread has had analysed and found to be higher in most micronutrients than standard reference values for wheat.’
‘I make my bread from the whole of the grain, so that all the fibre and the nutrients are still present in the flour. I make three loaves at a time, we eat one fresh and freeze the other two, which are almost as good as the fresh loaf when unfrozen. This way, I make all the bread we eat at home.’
About the baker
You can read Neil's story in issue 59 of True Loaf magazine.
Recipe text © Neil Spence.
Reproduction prohibited without written agreement of the copyright holder.
Social sharing
If you make this, please share your photo(s) with the world on social media using #RealBread and other relevant hashtags, linking back to this recipe. Better still if we can see you in the photo, too: #WeAreRealBread!
Please don't forget to tag us, and the recipe's author. You can find us on:
- Instagram: @RealBreadCampaign
- Facebook: @RealBreadCampaign
- X: @RealBread

Published Monday 1 July 2024
Real Bread Campaign: The Real Bread Campaign finds and shares ways to make bread better for us, better for our communities and better for the planet. Whether your interest is local food, community-focussed small enterprises, honest labelling, therapeutic baking, or simply tasty toast, everyone is invited to become a Campaign supporter.
Support our charity
Your donation will help support the spread of baking skills and access to real bread.


